NoxPlayer – Review, Installation and Setup Guide
There is no doubt that the Android ecosystem has completely grabbed the attention of users from PC to mobile. Millions of apps and games that are available on Google PlayStore have hooked users to mobile. But the real problem with these handheld devices is their screen size (which is also an advantage from a different perspective).
I am one of those millions of users who love playing games on a PC rather than on a smartphone because of the immersive experience I get from the larger screen size.
If you are also part of this subset of users who enjoy gaming on PC and looking for ways to run Android games on PC, then you are on the right page of the internet. In this post, you will be riding the wave of information that will take you to the world of Android inside Windows or macOS, which is the best of both worlds. i.e the countless library of games inside your big screen.
By now you might be wondering how is this even possible.
The answer to this question is, that it is possible using emulators.
Contents
What is an Emulator?
In layman’s terms, an emulator is a piece of software that mimics the behavior of software inside a different software. Here in our case, the emulator software behaves like Android software inside a Windows or Mac machine.
There are many Android emulators in the market, but not every one of them is good for regular usage. while some emulators are hungry for resources, others are buggy and not optimized to deliver seamless performance.
After testing multiple emulators, I ended up with a couple of good Android emulators and NoxPlayer is one among them.
What is NoxPlayer?
NoxPlayer is one of the best android emulators available and is developed by Nox Digital Entertainment Co. Limited. With its plethora of features, this multi-lingual Android player has amassed more than 150 Million users from 135+ countries.
With NoxPlayer, gamers can play Android games on their game stations and developers can debug their apps on their workstations. The best thing is that it is available for both Windows and macOS.
Personally, I believe that Nox and other popular emulators are like drawbridges letting Android apps and games into the walled castles of Apple and Microsoft. 😉
So, if you are looking for a stable and performance-optimized Android emulator to play games on either the macOS or Windows, NoxPlayer is not going to disappoint you.
If you are excited to get your hands on NoxPlayer and start playing your favorite Android games on your PC, kickstart your exciting ride by learning how to install NoxPlayer on your desktop or laptop.
Instead, if you wish to explore the features of NoxPlayer you can skip to the features and come back here later to install Nox Player if the Nox player features satisfy your thirst for the best Android emulator.
How to Install NoxPlayer on Windows OS?
As mentioned earlier Nox Player can be installed on both Windows OS and macOS.
If you are using a Windows laptop or desktop, follow the below guide to install Nox Player in Windows. This method works for all versions of Windows including the latest version of Windows 11 and other older versions like Windows 10, 8, and 7.
Step 1: Download the Nox Installer File
To get started with Nox, the first thing you’ve to do is to visit the official website of Nox Player (bignox) to download the latest version of the Nox Player installer file (the file size nearly counts around 500 to 550 MB). You can look for it on your own or redirect to the website from here.
Step 2: NoxPlayer Installation Process
After downloading the installer file, find it in the folder and select the file. Then, choose ‘Yes’ on the pop-up screen to allow the software for installation.
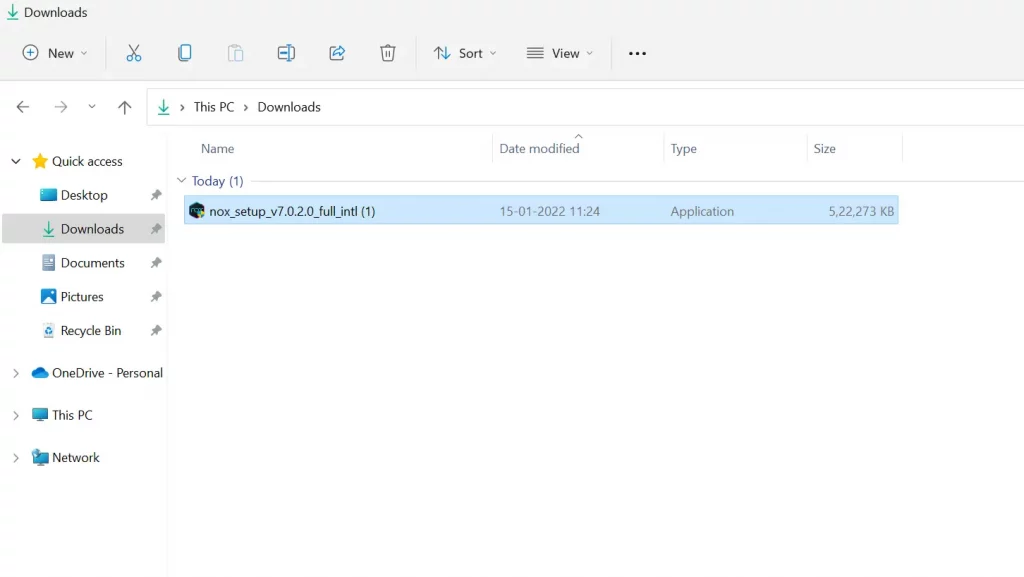
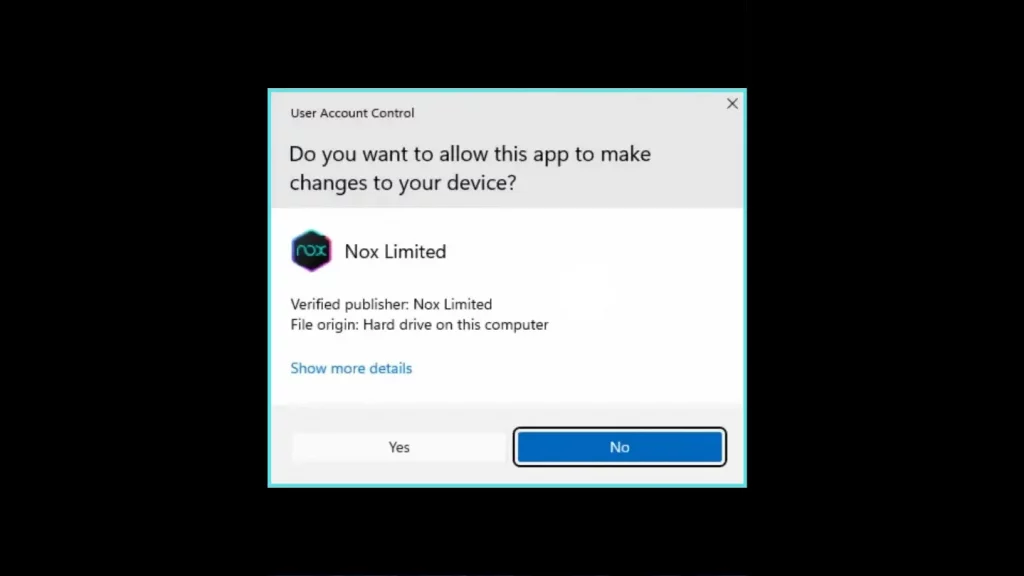
Step 3: Customize the Installation
By default, Nox may install in the C:/ drive. If you’d like to proceed with the directory, accept the software license and hit the ‘Install’ button on the installation wizard to commence the installation.
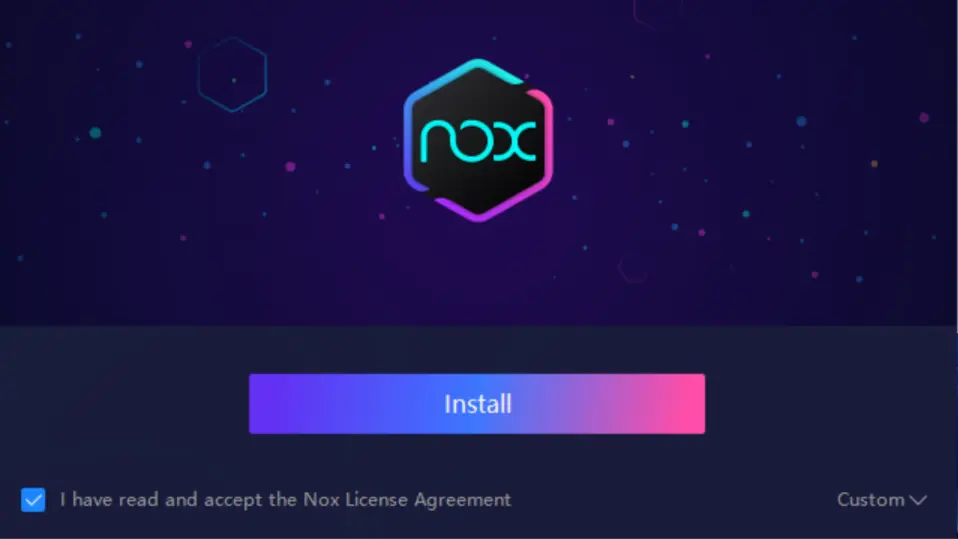
In case you’d like to change the directory, expand the ‘Custom’ option and click on Browse. Look for the folder you wish to set as a directory and hit the ‘Install’ button.
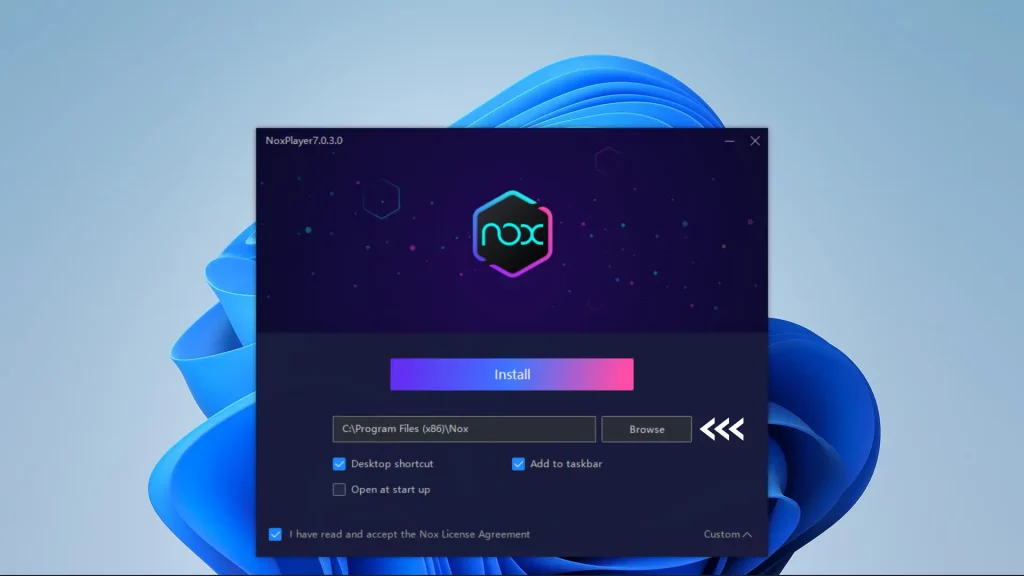
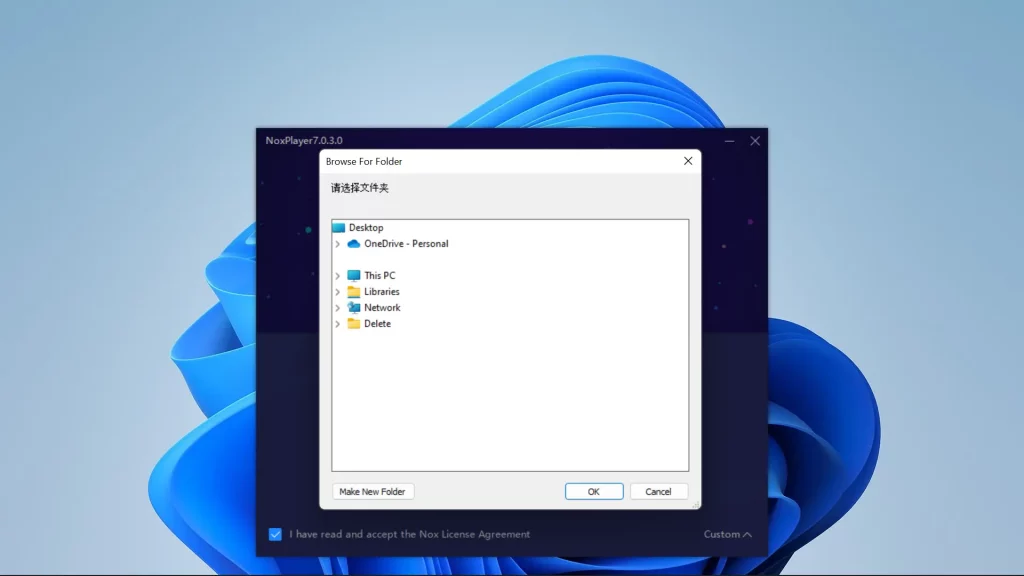
Note – You’re not allowed to change the directory after the installation. So, make sure to set right everything before you hit the Install button.
Step 4: Give it a Final Touch
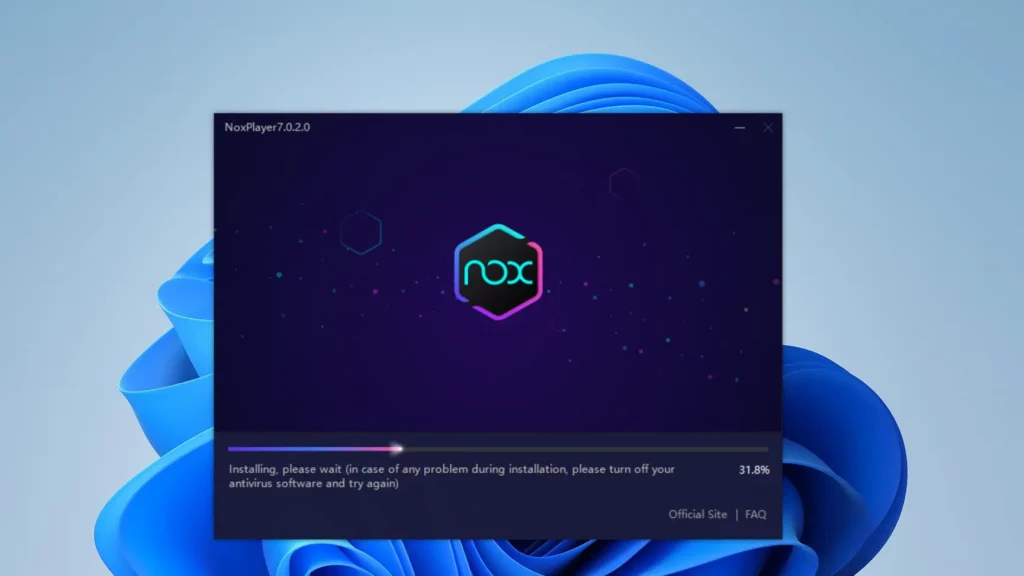
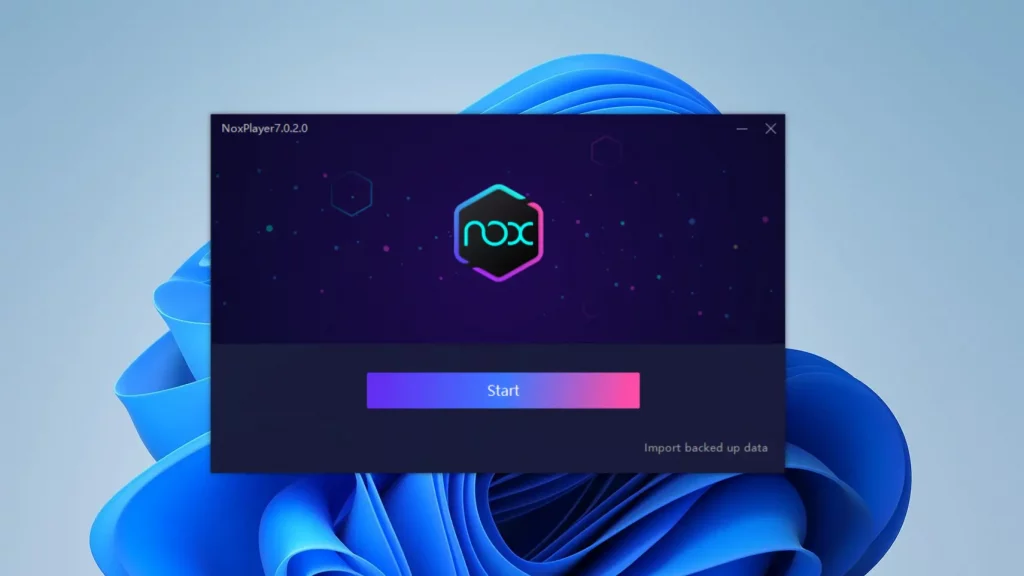
Nox will finish the rest of the installation process automatically. So, wait until the progress bar reaches the end (no user input is required) and finally hit ‘Start’ to land on the Nox home screen.
How to Install NoxPlayer on macOS?
Most of the games and apps that are available for Android are available for iOS as well. But if you want to play your favorite Android games on your MacBook then you can install NoxPlayer on your MacBook and run Android games on MacBook.
PS: NoxPlayer is not yet available for MacBooks with Apple M1 and M2 chips. We will update this section once it is available. The following process works with all MacBooks running on Intel chips and supports Mac OS X 10.9 (Mavericks) or higher version
To install Nox Player on macOS, follow the below guide.
Step 1: Downloading the Nox Player installation file
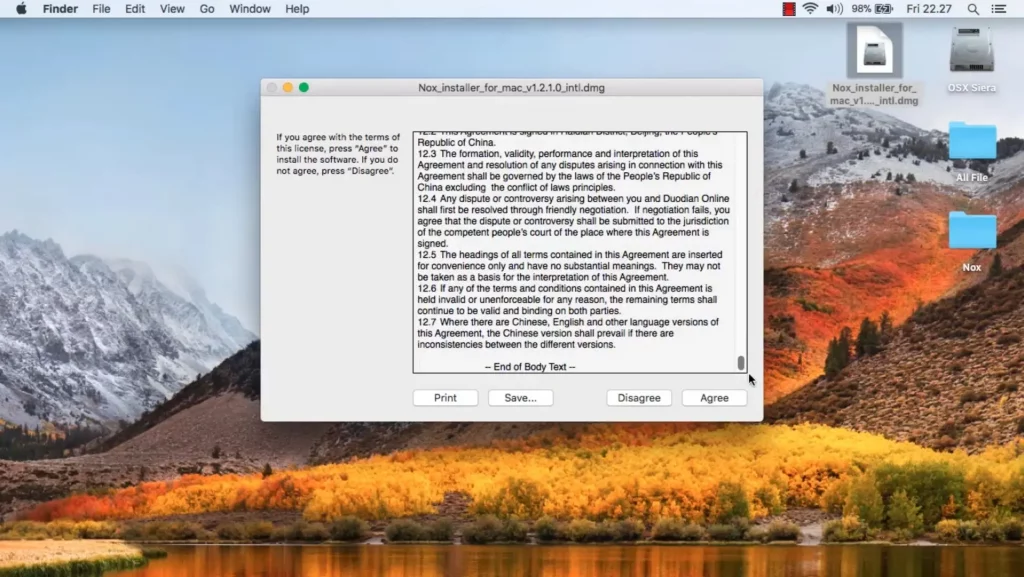
Download the disk image file of the Nox Player for macOS from its official website or click on the below button which takes you to the official website. Once the file is downloaded save it in your local directory.
Step 2: Installation of Nox Player on macOS
Now, navigate to the folder where the NoxPlayer dmg file is stored and double-click on the DMG file.
Upon double-clicking, the DMG file gets unzipped. Once it is unzipped, you will see a pop-up asking you to move the Nox Player app to the Applications folder.
Just drag the Nox Player icon to the Applications folder and drop it inside the folder.
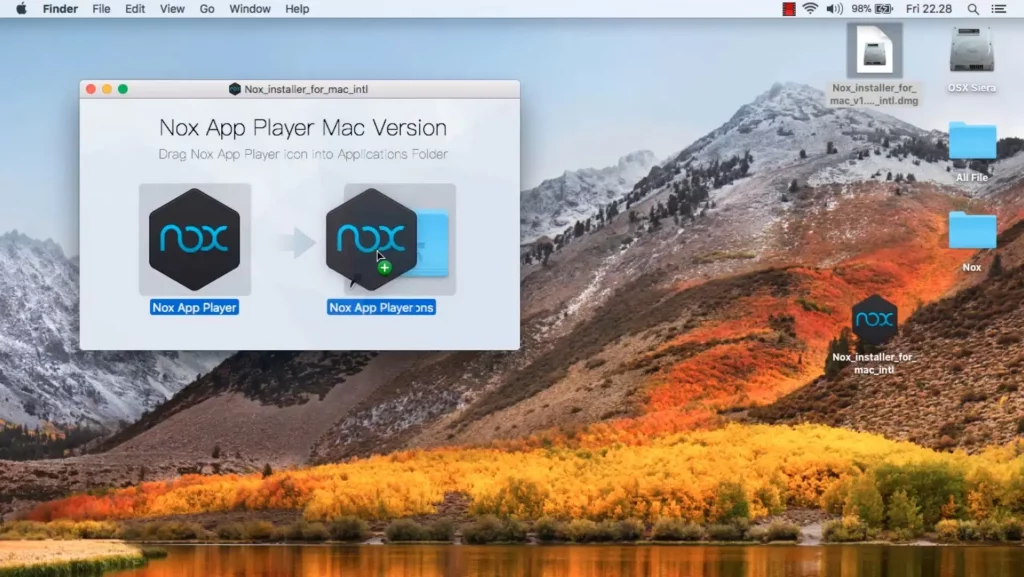
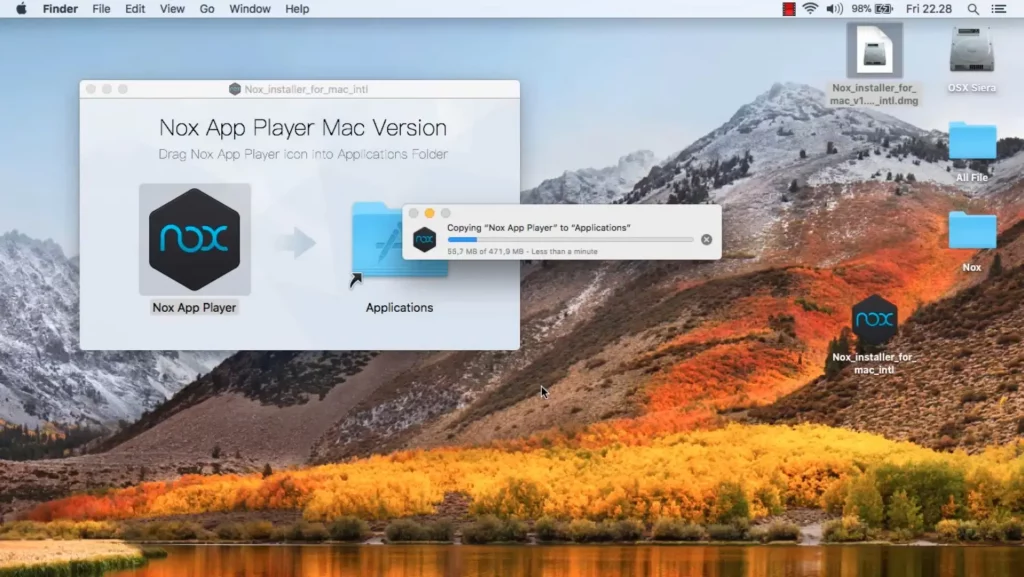
The NoxPlayer will now be copied and installed on your MacBook. Once the installation is done, you can dock the NoxPlayer in the dock and launch it whenever needed or you can access it from the applications tray.
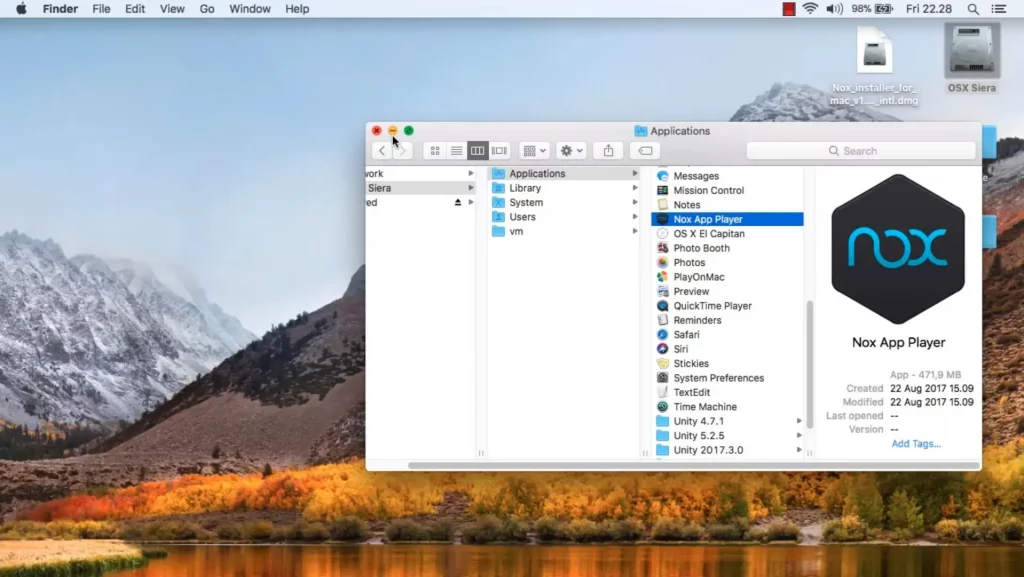
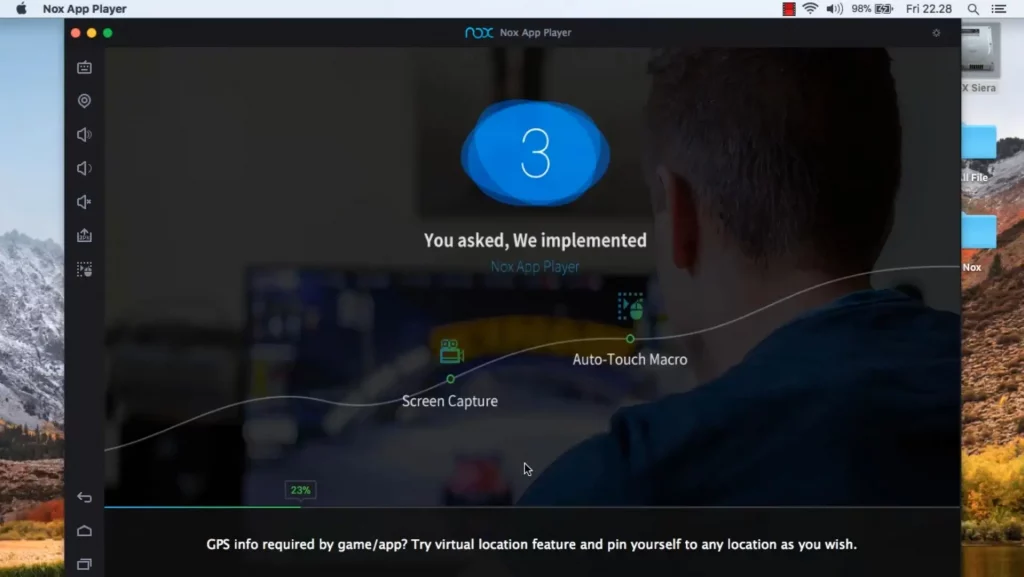
Launch the NoxPlayer by double-clicking on the Nox Player icon and you can start playing your favorite Android games on macOS.
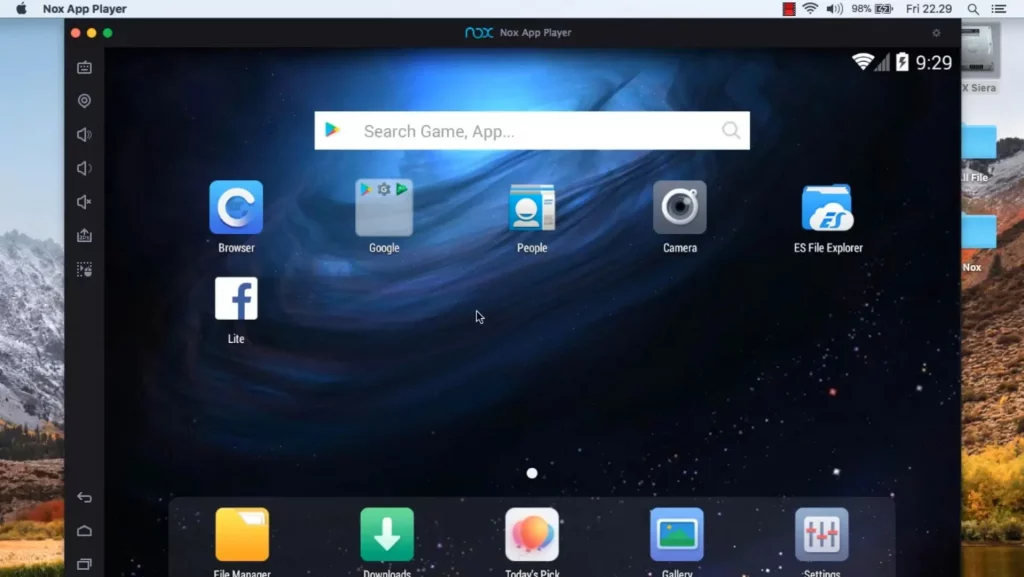
How to Setup Google Account on NoxPlayer?
You’ve NoxPlayer installed on your device. You need to sign in with a Google account to access PlayStore and download apps and games.
To do it, click on the long Search bar on the Nox home screen and search for Play Store in Google. From the appeared search results, jump to the Play Store and hit the ‘Sign in’ button.
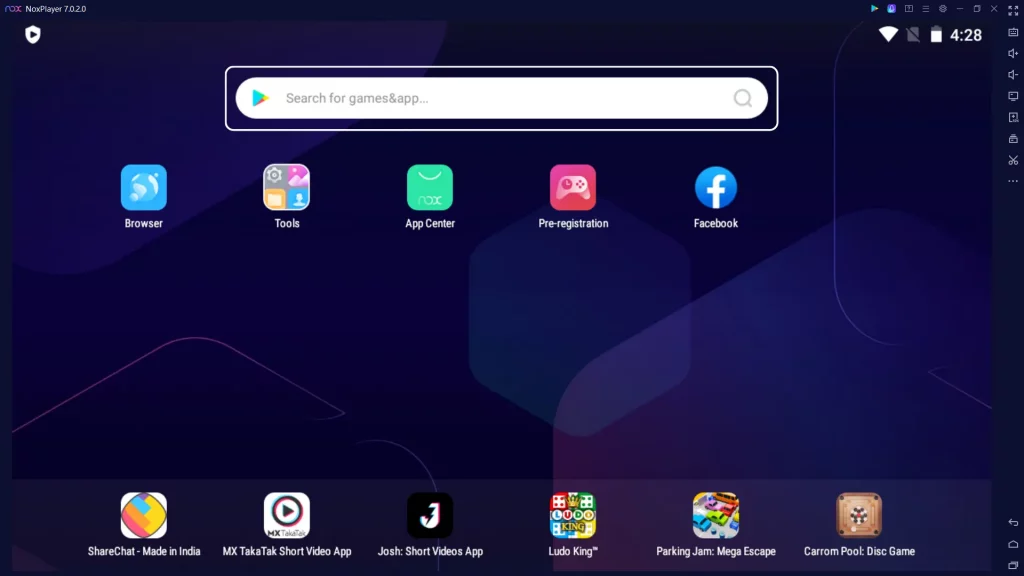
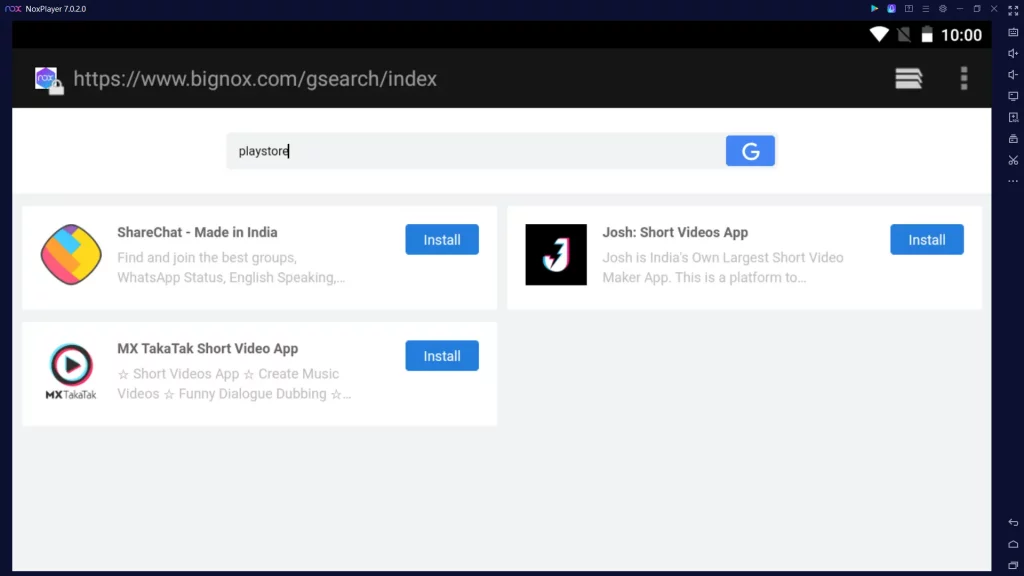
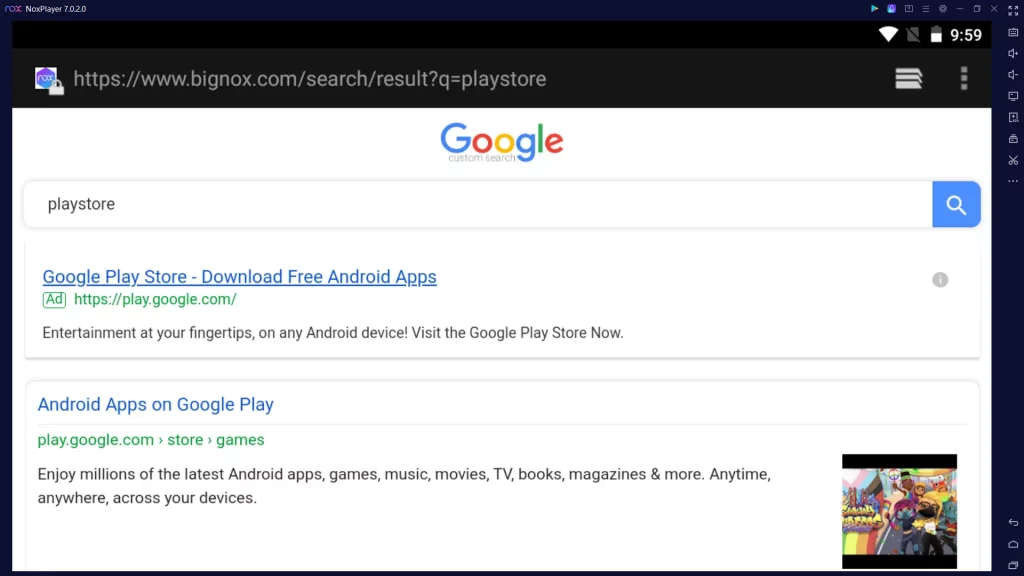
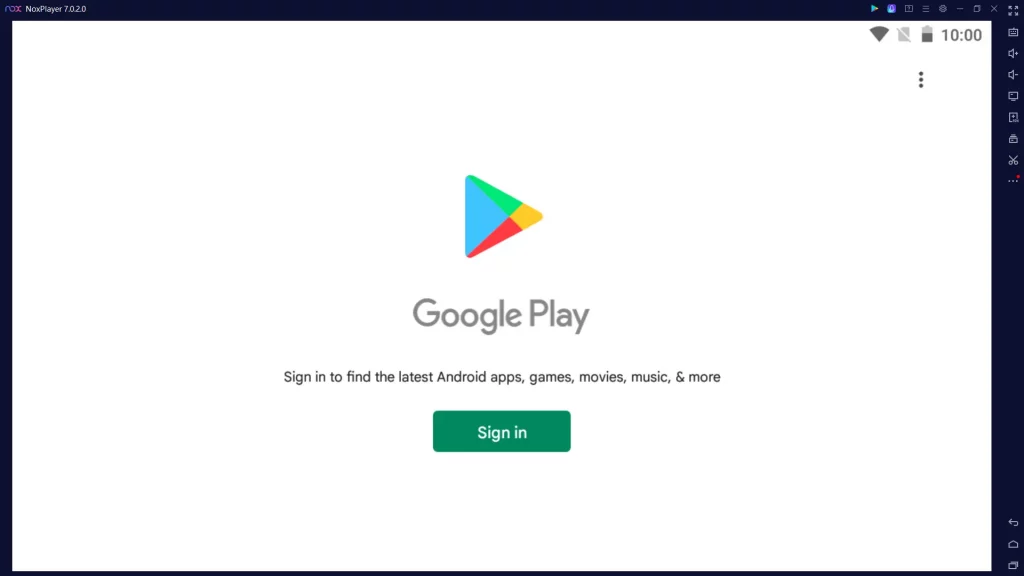
Now, log in to the Google Play Store with your Google account. If you wish to sync your existing apps or games you can log in with the same account that you use on other devices.
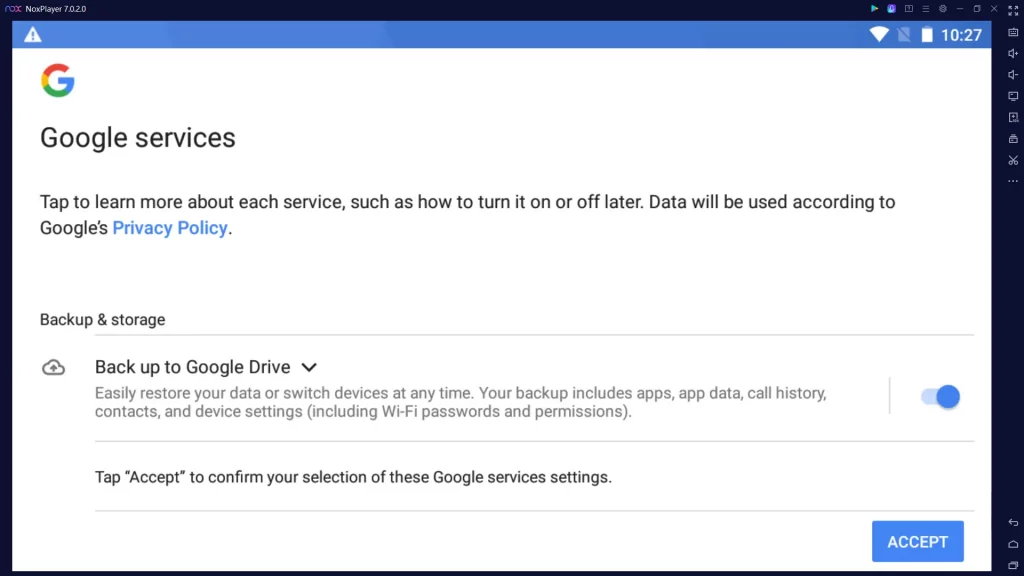
Optionally you can sync your data to Google drive which helps you restore your data when needed in the future.
Finally, complete the sign-in process by accepting Google’s terms and you are all set to install Android apps from Google Play to your MacBook or Windows laptop.
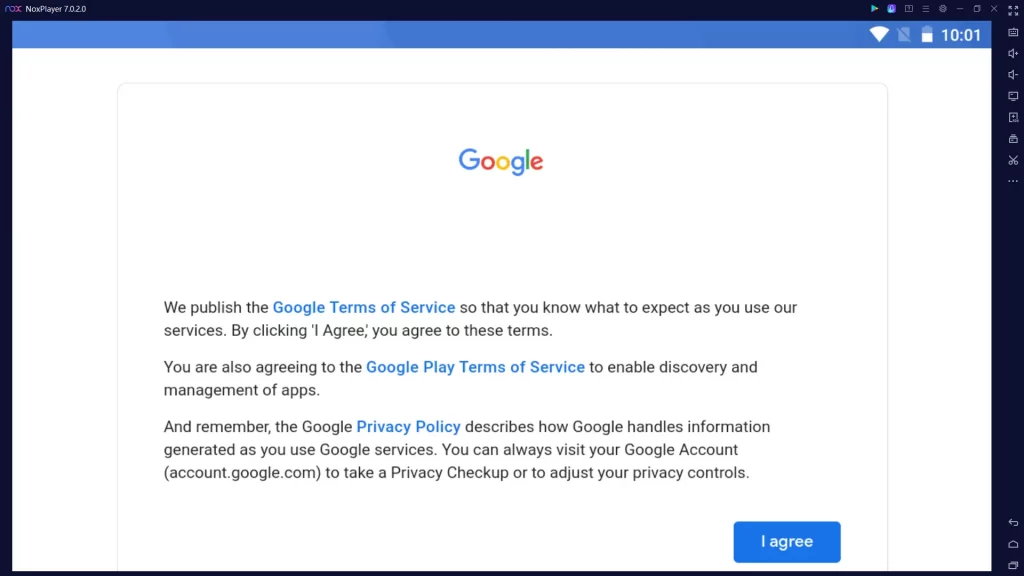
How to Download Apps on NoxPlayer?
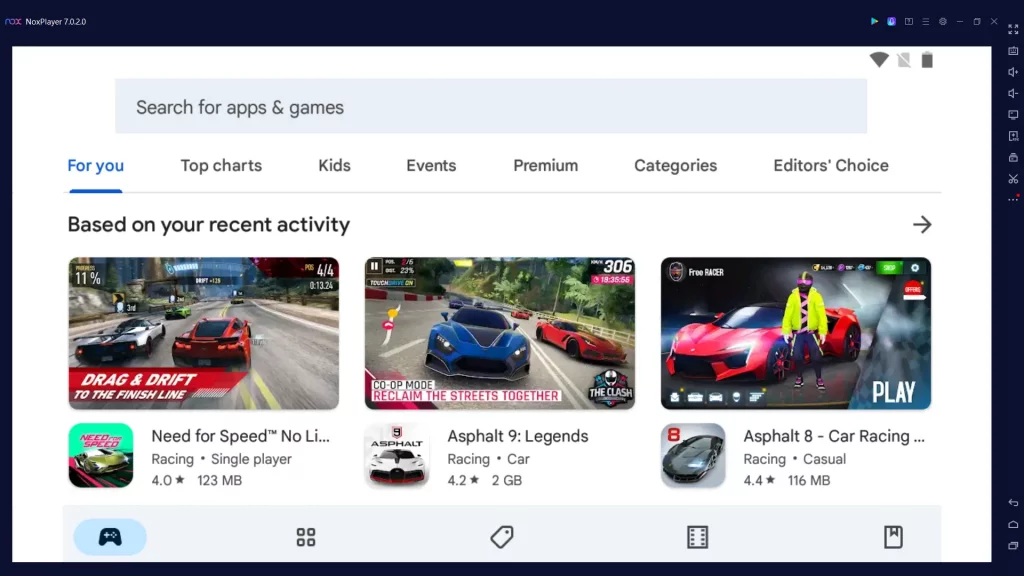
Downloading Android apps from Google Play Store to Nox Player is almost similar to installing apps or games on your Android device.
1. Click on the long Search bar on the Nox home screen and look for the Play Store in Google Search.
2. From the appeared search results, go to the Play Store directly from the web to download apps and games.
3. Once you’re in, start installing apps and games the same as you do on the mobile.
For reference, visit the above screenshots.
Also Read: Bluestacks Review and Setup – Play Mobile Games on PC
System Requirements for NoxPlayer – Recommended
Nox is a fully optimized performance-packed emulator in the market. It is more stable and offers smoother gameplay. But, nothing works great when your PC doesn’t meet the following requirements. So, to fully experience Nox Player without any issues, make sure that your system meets the following requirements.
| OS | Windows 7 and above, macOS 9 and above, Linux. |
| RAM | 4 GB or higher |
| Storage | 3 GB of free disk space is recommended for better performance |
| Processor | Multi-core processors that support VT-x or AMD-V virtualization technology. Doesn’t support M1 and M2 |
| Graphics | Must support Open GL 2.0 |
Pro Features of NoxPlayer
Before wrapping up about NoxPlayer let’s take a look at some of the latest features of NoxPlayer that are designed to enhance the Android gaming experience on a desktop.
NoxPlayer comes with tonnes of features out of the box and some of them are really cool. Of all that, I’ve listed some of the best features that excited me while using the app on my Windows 11 PC.
Must Read: BlueStacks vs NoxPlayer – Find the best Android Emulator for PC/Mac
1. Customised Keyboard Control
The latest version of NoxPlayer comes with the ability to control Android games via the keyboard. In addition to this, users can also map the keys to suit their preferences and convenience.
2. Performance Optimization
This is where NoxPlayer strikes the chords. Well-optimized performance has been the biggest advantage of NoxPlayer since the beginning. We haven’t noticed any lag or performance during our testing of NoxPlayer for 5 hours straight.
The emulator is able to quickly launch the installed Android apps and games and the apps performed way better than a mid-range Android device.
3. Multi-Instance
Since NoxPlayer version 6, the NoxPlayer is packed with the multi-instance feature. The multi-instance feature allows users to run more than one instance of NoxPlayer. It means this feature allows you to run multiple games or apps simultaneously in different windows.
While this feature when used has shown some impact on performance but its impact is proportional to the system resources.
4. Voice Chat Feature for Playing Games
Who doesn’t love playing games like PUBG and Free fire by talking to their teammates and having fun while playing the game? Fortunately, NoxPlayer comes with support for voice chat where gamers can communicate with their teammates through voice chat. This is really one of the coolest features that NoxPlayer has.
Wrapping Up
No doubt, Android is by far the most popular mobile operating system with the largest ecosystem of apps and games. Not everyone can afford a flagship Android device to run some of the best Android games and that is where emulators like NoxPlayer come into the picture turning your workstations into gaming stations as they virtualize Android on your PC to use apps and play games comfortably with smart controls from the comfort of your home without thinking about the performance.
NoxPlayer optimizes everything for you in the background and delivers a seamless performance which is much needed to have the best gaming experience.
If this post helped you find ways to run your favorite Android games on your pc by guiding you to install NoxPlayer on your PC, share your happiness with us through the comment section below.

4 Responses
[…] Review: NoxPlayer – Bluestacks Alternative […]
[…] What Is NoxPlayer? […]
[…] is at its core. Whatever the applications or games you’d like to run on PCs, NoxPlayer easily handles loads of apps by not stressing your PC. Every feature loaded in it gives you […]
[…] you face any difficulties with BlueStacks or want to experience more, try NoxPlayer. A fully optimized gaming Emulator. It is specially made for bearing loads of rugged games of any […]