How to Take Screenshot in Windows 11
Still, trying the same old methods to screengrab Windows screens? It is time to change the path since Windows 11 has now become super handy and more accessible. So, stop trying old methods and check this guide on how to take screenshot in Windows 11 with built-in tools.
Capturing full/partial snaps of Windows screens in this brand new OS is very easy. Thanks to Microsoft & team for introducing the Snipping tool for taking screenshots.
We all know that the prt sc button on the keyboard makes screenshots in Windows 11. But, the problem with this shortcut is that it doesn’t show any indication that the screenshot has successfully been taken.
Also, the captured screenshots won’t be saved automatically in any file format. And to view it, one has to first paste it into an application like Microsoft Word, Paint, or somewhere as required, which is really frustrating.
Do you think the same applies to Windows 11? No, it’s all easy now. No more hassles to save screenshots. Even capturing a small portion of the screen is also made easier with the Snipping tool – a simple solution to all problems.
Let’s see how to take screenshot in Windows 11 expertly either the entire screen or a small portion with a shortcut and by using the new Windows built-in Snipping tool.
Contents
How to Take Screenshot in Windows 11
There are different ways on how to take screenshot in Windows 11. Depending on what you exactly need, you can proceed with the desired method and capture Windows screens either fully or partially using the Snipping tool, Xbox Game Bar, Keyboard shortcut, etc.
Fullscreen Screenshot
Whether it is for temporary work or business, the following ways on how to take screenshot in Windows 11 captures all the visible area including the taskbar, Start button, etc. It means, there’s nothing to escape from the shot.
Let’s see how to take screenshot in Windows 11 with all the available ways in Windows 11.
1. With Shortcut Keys
This method is super fast and handy. All you have to do is to press the keys Win + prt sc simultaneously.
The captured screenshot will then save to your Pictures > Screenshots folder in PNG file format.
2. With Xbox Game Bar
Best suits for capturing the moments of games. To screengrab using Xbox Game Bar, follow these steps.
1. First, open the source page/application you want to take a screenshot of.
2. Now, hit the Win logo key + G at the same time to bring up the Xbox Game Bar.

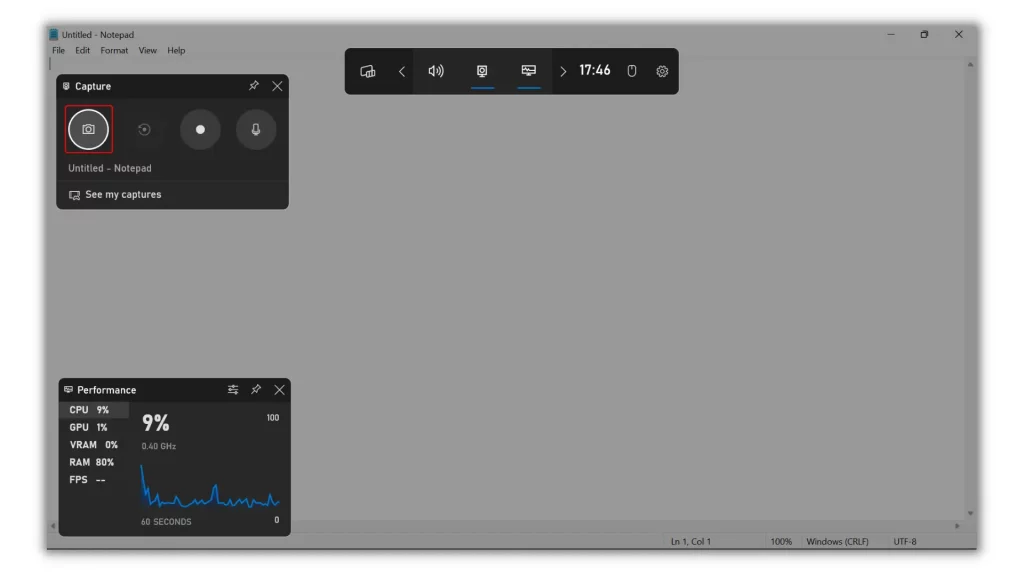
3. On the Widget menu, choose Capture and press the Win logo key + Alt + prt sc.
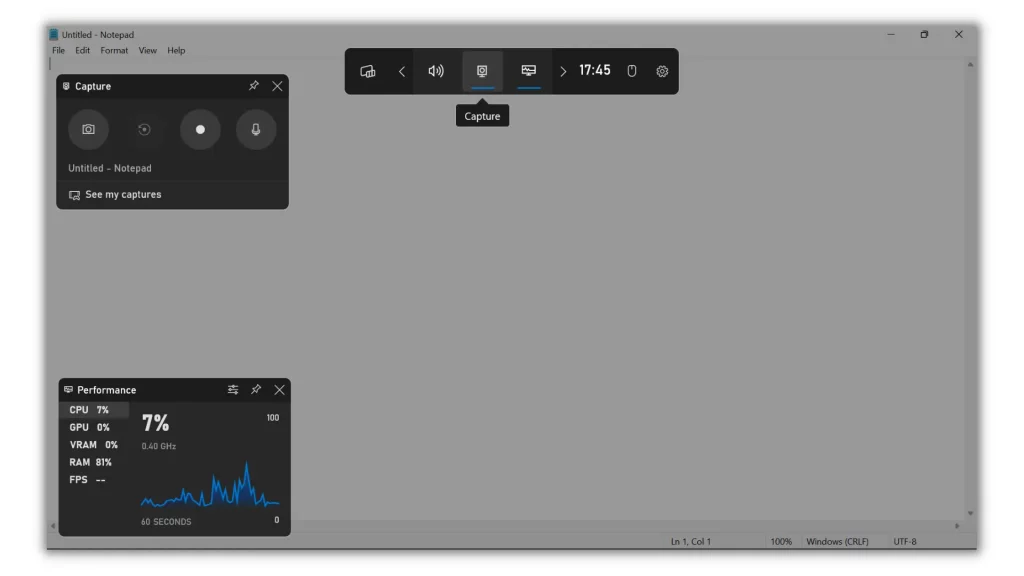
Or hit the Take Screenshot button in the Capture menu on the top left.
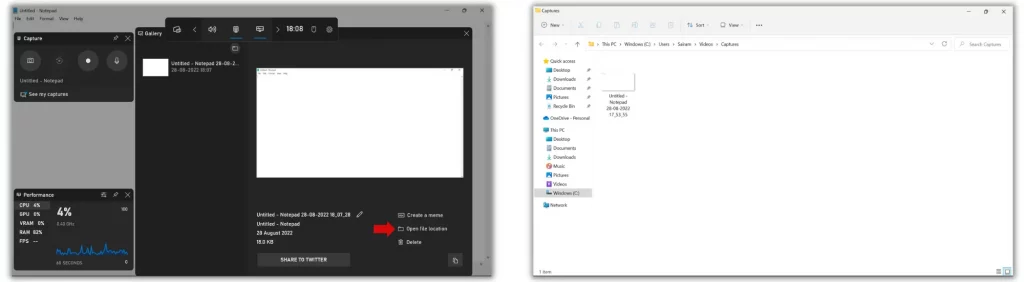
4. When you’re done, a notification will pop up on the right side of your screen, saying Screenshot saved.
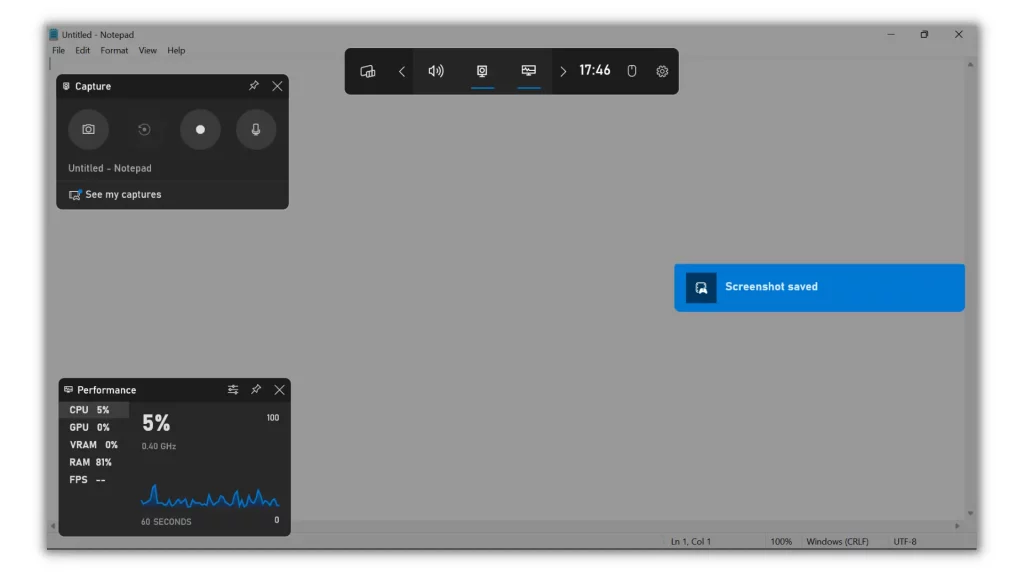
5. To view it, click on it and choose Open file location or go to the C:\Users\Your Name\Videos\Captures folder in File Explorer.
3. With Microsoft PowerPoint
Not only for presentations, but Microsoft PowerPoint can also be useful for taking screenshots and video capturing screens.
Here’s the step-by-step guide on how to take screenshot in Windows 11 using Microsoft PowerPoint.
1. First, bring up the source page/application you want to take a screenshot of.
2. Now, open the PowerPoint app and begin with a Blank Presentation.
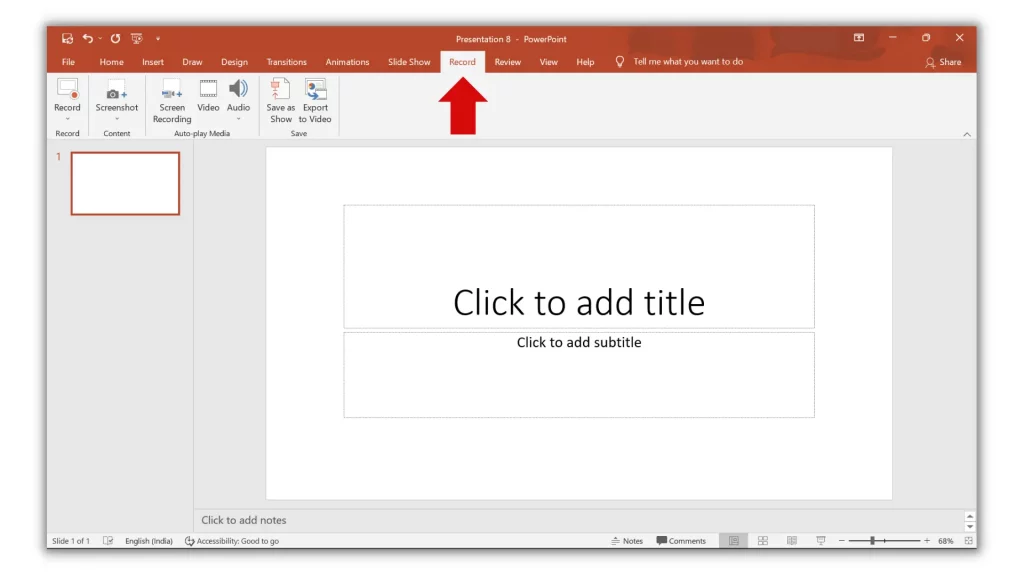
3. Once it is loaded, click on the Record tab and select Screenshot.

In the Available Windows gallery, you see a few Windows that are currently open.
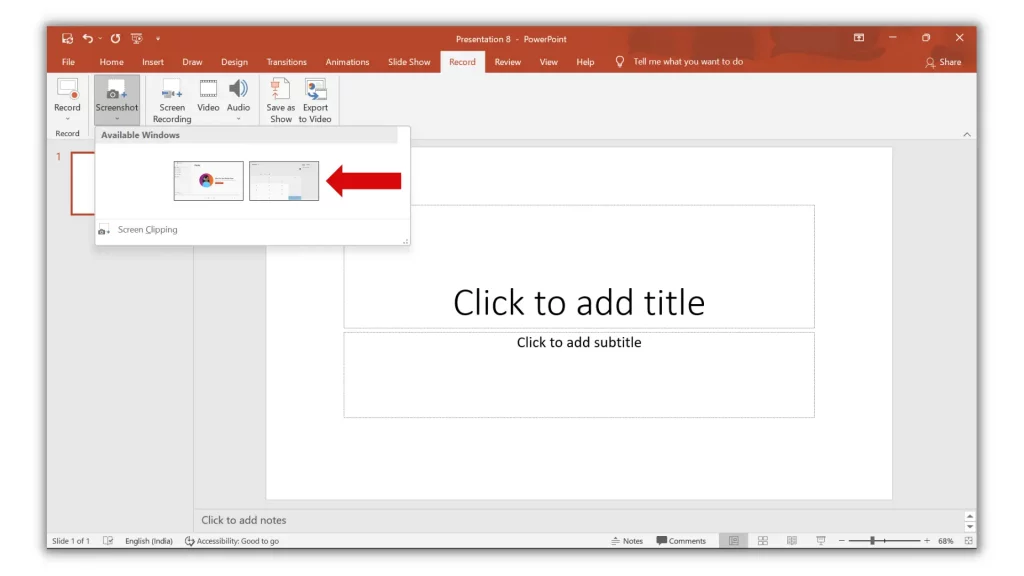
4. To take the shot, simply click on the thumbnail of that Window.
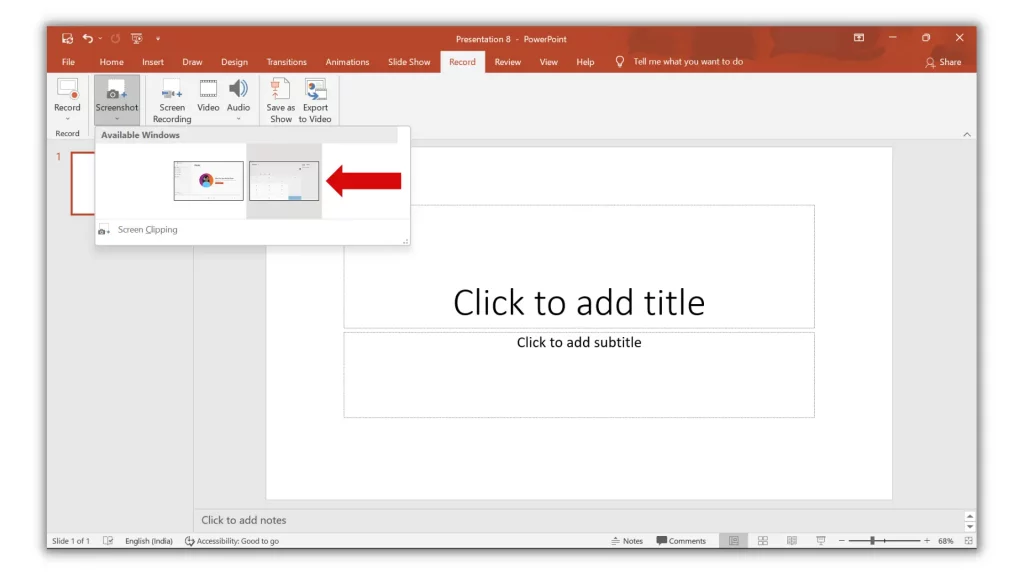
Then it will be inserted into the PowerPoint slideshow.
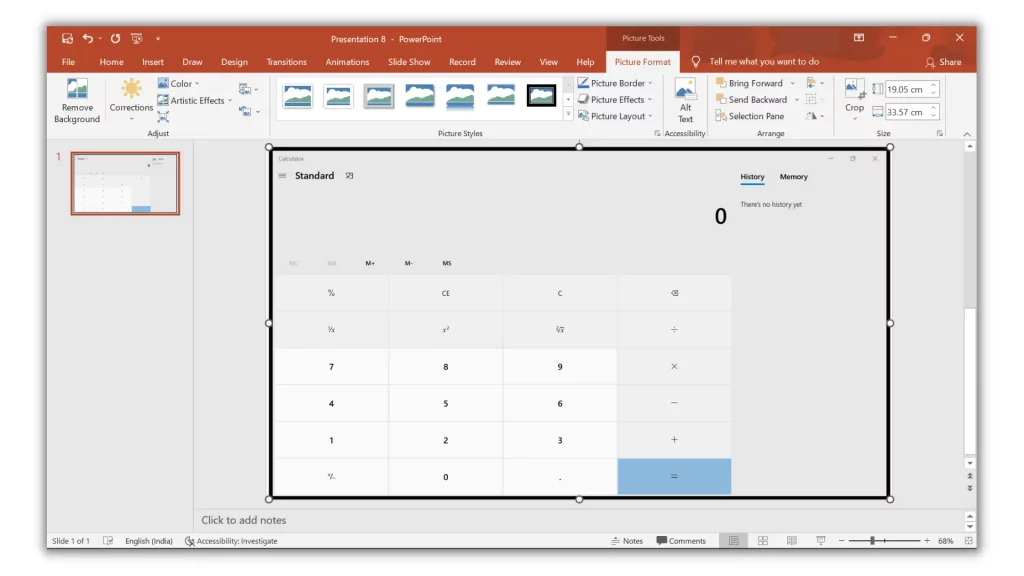
5. Right-click on the image and choose Save as Picture….
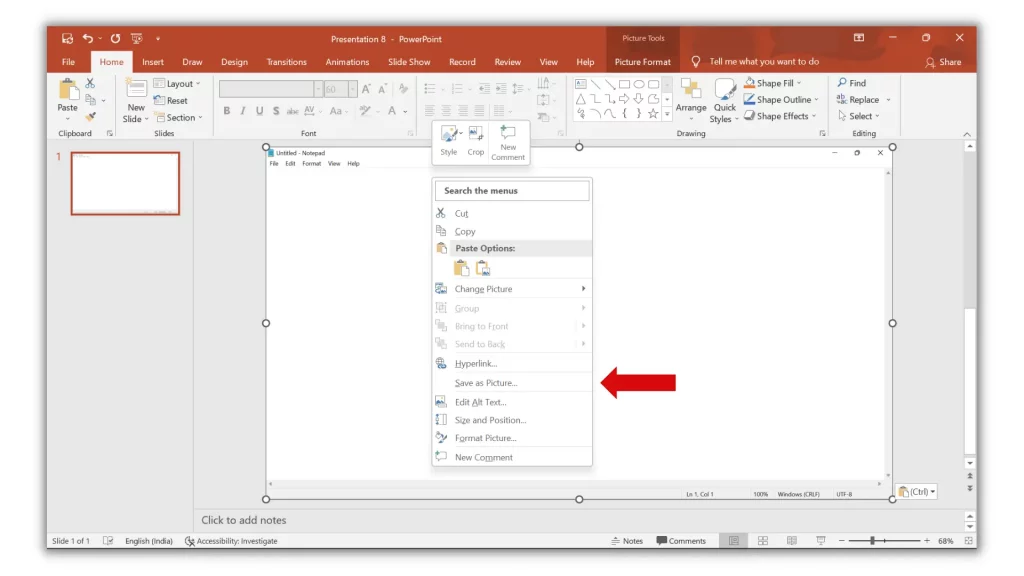
Lastly, pick a Folder > give it a name, and hit Save.
Suggested Read: How to Screen Record on Windows 11
A Portion of the Screen
Sometimes you may be required a small portion of the screen as an image. And to finish the job, you’ll take a full-screen screenshot and later crop the required part using built-in/third-party tools, which is the regular process many followed.
It is time-consuming and dependent. However, if you’re not ok with it, try the following ways to capture a part of the screen in Windows 11.
1. With Snipping Tool
Whether you need full or part of the screen, the Snipping tool is made for both purposes. Here are the steps you’ve to follow to capture Windows screens in different sizes and shapes.
1. First, make the source page ready and hit Win + Shift + S.
2. Then your screen will flash and a small Snipping Tool menu will appear at the top of the screen.
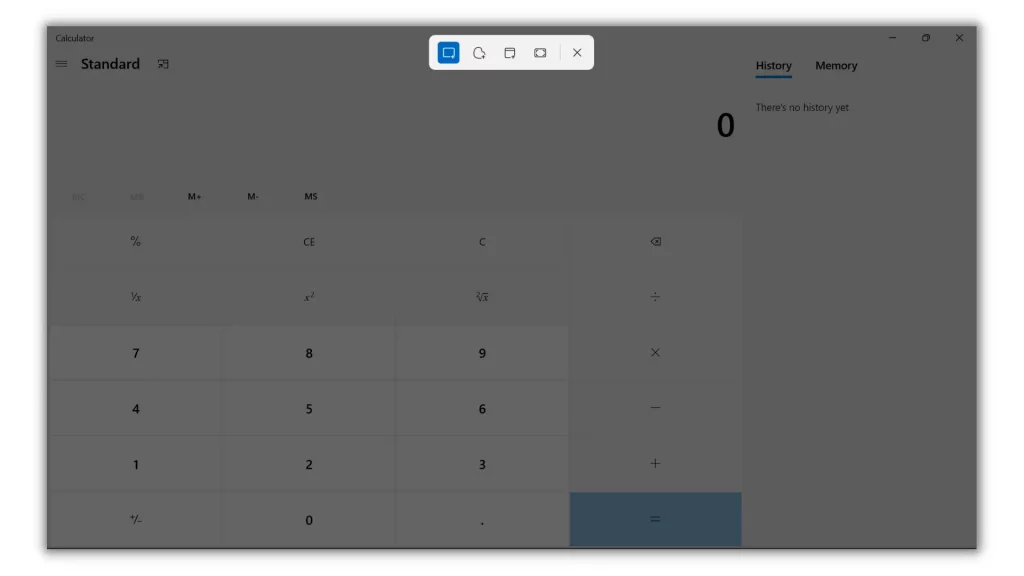
3. Based on your requirements, you can press the desired button to take a full/partial screenshot.
The following are actions that each type of Snip performs.
- Rectangular Snip – The Rectangular Snip lets you draw a rectangle to capture a particular area of the screen in a screenshot.
- Freeform Snip – The Freeform Snip allows you to draw freeform to capture any area.
- Windows Snip – The Window Snip lets you capture a specific window that you select.
- Fullscreen Snip – The Fullscreen Snip captures the entire screen. It is the same as pressing Win + prt sc.
PS: For the first two types of snips, draw the area of the screen you want to capture. And for the Window Snip, select the window you wish to capture.
4. Once you’re done taking the screenshot using any of the four snips, a notification will appear in the bottom right.
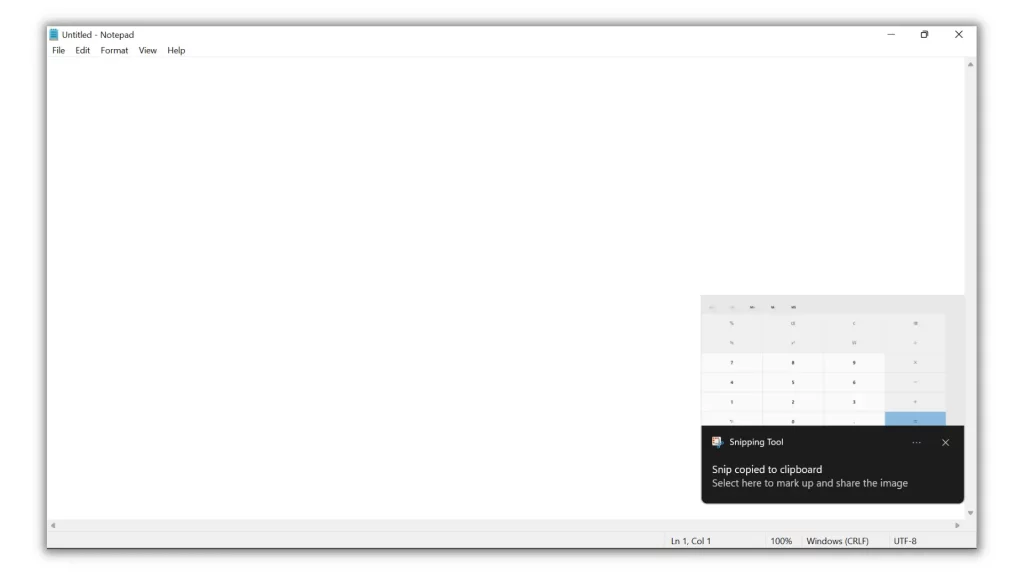
5. Click on it and hit Save in the pop-up that appears.
2. With Microsoft PowerPoint
Similar to the Windows 11 Snipping tool, Microsoft PowerPoint also has a snip feature built in. It is called Screen Clipping.
Let’s see how to use Screen Clipping in Microsoft PowerPoint to capture some portion of the screen.
1. First, set the source page ready and open the PowerPoint app.
2. Take a new slide and head over to the Record tab.
3. Now, click on Screenshot and choose Screen Clipping in the Available Windows gallery.
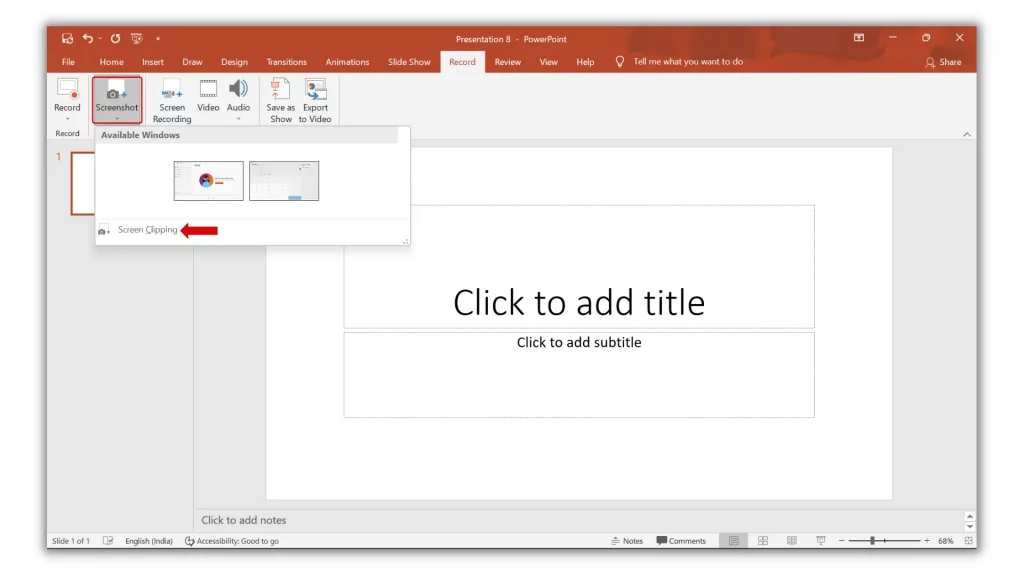
Then the screen turns white and the pointer becomes a cross.
4. Press and hold the right mouse button.
Slowly drag to select the part of the screen that you want to capture and release.
5. The window or portion of the screen you selected is automatically added to the slideshow.
Lastly, right-click on the image and choose Save as Picture… > pick a Folder > give it a name and hit Save.
Note: If you have multiple windows open, first, click on the window you want to capture before starting the screenshot process. So that the window will move to the first position in the Available Windows gallery.
Suggested Read: How to Take Screenshot in Incognito Mode
Frequently Asked Questions
1. What is the shortcut key to take a screenshot in Windows 11?
The best key combination that lets you take a screenshot in Windows 11 is Win logo key + prt sc.
2. Where do the screenshots go on Windows 11?
If you use the keyboard shortcut to screengrab Windows screens, all the screenshots will go to the Pictures > Screenshots folder in File Explorer.
If you take a screenshot using Xbox Game Bar, it will move to the Videos > Captures folder in File Explorer.
Finally, screenshots taken with PowerPoint and the Snipping tool allow you to save the screenshot manually. You can use the pop-up notification and save accordingly.
3. How do I take screenshots on a Windows 11 laptop?
To take a screenshot on your Windows 11 laptop, simply press the buttons Win logo key + prt sc at the same time.
Final Verdict
No matter how to want to take a screenshot and how you want to save it on your PC/laptop running this new OS, with these Windows 11 built-in tools, you can easily screengrab the total visible area or some part of the screen according to your requirements – without letting anything escape from the shot.
If you find this post helpful, share it with your friends who are newly experiencing this new whole version of Windows.


1 Response
[…] Also Read: How to Take Screenshot in Windows 11 […]